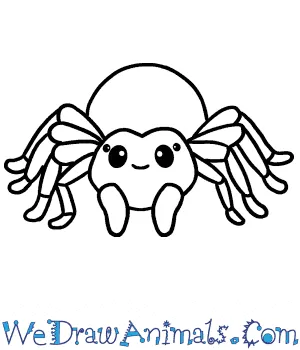
Are you fascinated by tarantulas and want to capture their intricate beauty on paper? Drawing a tarantula might seem daunting at first, but with a step-by-step guide and the right tools, you can create a stunning piece of art. This comprehensive tutorial will walk you through the process, from gathering your supplies to adding the final touches, ensuring you can draw a tarantula with confidence and skill. So, grab your pencils and paper, and let’s get started on this exciting artistic journey.
What You’ll Need to Draw a Tarantula
Before diving into the drawing process, it’s essential to gather the right materials. Having the correct tools will not only make the process easier but also enhance the quality of your artwork. This section outlines the essential supplies you’ll need to create a detailed and realistic tarantula drawing. From the type of paper to the pencils and additional tools, ensuring you have everything ready will set you up for success.
Essential Drawing Supplies
The foundation of any good drawing lies in the tools you use. For a tarantula drawing, you’ll need several essential items. A set of graphite pencils with varying degrees of hardness (e.g., HB, 2B, 4B, and 6B) is crucial for achieving different shades and textures. A good quality eraser, such as a kneaded eraser, allows for precise corrections and highlights. Additionally, a sharpener is necessary to keep your pencils at their best. Optional items like a blending stump or tortillion can help smooth out shading, creating a more realistic look. The selection of these tools are critical for a successful outcome.
Paper and Pencil Selection

The type of paper you choose significantly impacts the final look of your drawing. For beginners, a smooth or medium-textured drawing paper is recommended. This type of paper is versatile and works well with graphite pencils, allowing for easy blending and detailed work. As you advance, you might explore different paper types, such as Bristol board, known for its smooth surface, which is excellent for detailed drawings, or paper with a slight tooth, which can create interesting textures. When selecting pencils, a range of hardnesses is essential. HB pencils are good for initial sketching, while softer pencils (2B to 6B) are ideal for shading and adding depth. Using various pencil grades enable you to create a variety of tones.
Other Helpful Tools
Beyond the basics, a few extra tools can make your drawing process more enjoyable and the results more professional. A blending stump or tortillion is invaluable for smoothly transitioning between shades and creating soft gradients. A ruler can help with measuring and ensuring accurate proportions, especially for the tarantula’s legs and body segments. A magnifying glass might be useful for observing the details of a tarantula in reference photos or real-life examples, allowing you to capture intricate features more accurately. Finally, a fixative spray is a great option to protect your finished drawing from smudging and fading. These supplementary tools will boost your work to the next level.
Step-by-Step Guide to Drawing a Tarantula
Now that you have your supplies ready, let’s get to the exciting part – drawing the tarantula! This step-by-step guide will break down the process into manageable stages, making it easy for you to follow along and create your own tarantula artwork. Each step builds upon the previous one, guiding you through the process of sketching the body, adding legs, detailing the features, and adding shading for a realistic look. Remember, practice makes perfect, so don’t be discouraged if your first attempt isn’t perfect. The goal is to enjoy the process and learn something new. Here is a systematic approach for creating a tarantula drawing.
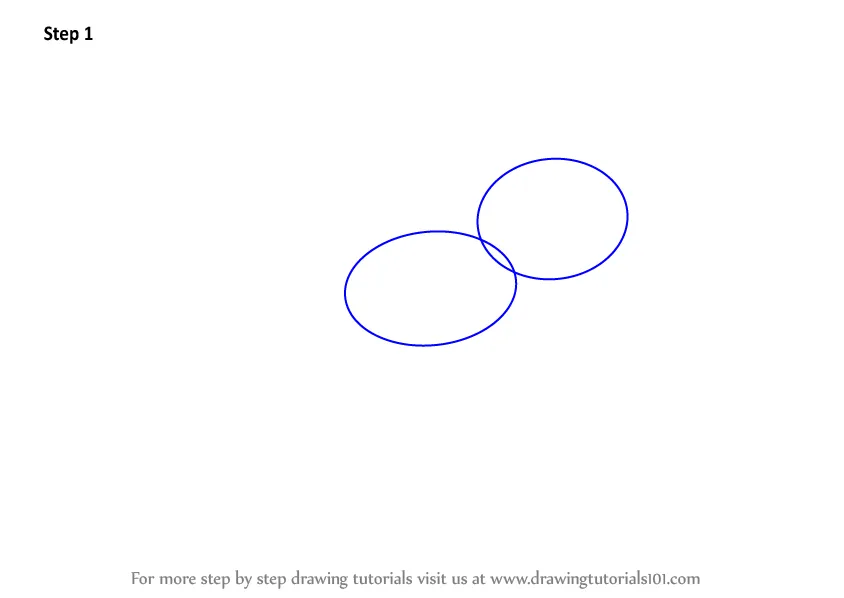
Start with the Body

Begin by sketching the basic shape of the tarantula’s body. The body of a tarantula is typically divided into two main parts the cephalothorax (the head and chest combined) and the abdomen. Start with a slightly rounded shape for the cephalothorax, resembling a teardrop or an oval. Following this, sketch a larger, more rounded shape for the abdomen. These two shapes will serve as the foundation for the entire drawing. Keep the initial sketches light and loose, as you will refine them later. Pay attention to the proportions, ensuring the abdomen is larger than the cephalothorax, which is characteristic of a tarantula. Lightly sketch these shapes and prepare for the next step.
Draw the Head and Cephalothorax
Refine the shape of the cephalothorax, paying attention to its details. This section will house the tarantula’s eyes, mouthparts, and the attachment points for the legs. Draw the area where the eyes will be located and consider adding subtle indentations to indicate the location of the fangs. The cephalothorax should have a slightly raised profile. The head should blend into the cephalothorax to the abdomen. Ensure that the cephalothorax is properly sized and proportioned compared to the abdomen. Take your time to achieve these details, which will create a more realistic appearance.
Adding the Legs
Now, it’s time to add the legs. Tarantulas have eight legs, and these are crucial for their appearance. Start by lightly sketching the basic shapes of the legs, paying attention to their positioning and angles. Tarantula legs are segmented, so indicate the joints. Remember that the legs should be placed around the cephalothorax. Begin by placing them evenly around the edges. It is very important that the legs are appropriately placed and do not overlap each other. Drawing guidelines can also help you with the proper placement of the legs. Adjust the leg angles and positioning according to how you want your tarantula to look. These are the essential components.
Detailing the Legs and Body
Once you have the basic leg structure in place, refine the details of the legs and body. Add the segments to the legs, indicating the joints and the overall shape. Tarantulas have a hairy appearance, so use short, fine strokes to suggest the texture of the hairs on the legs and body. Add the shape of the pedipalps, which are located near the mouth. Refine the shape of the abdomen, adding any patterns or textures. This will bring your drawing to life. These details add realism and depth to your drawing. Ensure the overall drawing is well-balanced.
Add the Eyes and Fangs
Now, focus on adding the facial features. Tarantulas have eight eyes, usually arranged in two rows. Lightly sketch the eyes, noting their placement. Add the fangs, which are located near the mouth. Since the tarantula’s fangs and eyes are the focal points of the drawing, adding this detail can boost the overall look. Adding this detail will enhance the realism. Also, this will help you to provide more character to your drawing. You may also look at a picture of a tarantula to help you with this step. Then, you can now proceed to the final stage.
Shading and Finishing Touches
The final step is shading and adding the finishing touches. Use your pencils to create shading, adding depth and dimension to your drawing. Start by shading the body and legs, focusing on creating shadows where the light would naturally fall. Use a blending stump or your finger to smooth out the shading, creating a seamless transition between the light and dark areas. Add highlights to create a sense of realism. Refine any details, correct any mistakes, and ensure the overall look is cohesive. Once you have this completed, you can then finalize your work by framing or protecting your drawing.
Common Mistakes to Avoid

Even experienced artists can sometimes make mistakes, but by being aware of common pitfalls, you can avoid them and create better drawings. This section highlights the most common mistakes made when drawing tarantulas, helping you improve your skills and avoid frustration. Understanding these issues can enable you to quickly improve and produce better artwork.
Proportion and Size
One of the most common mistakes is getting the proportions wrong. Pay close attention to the relative sizes of the cephalothorax, abdomen, and legs. The abdomen is typically the largest part of the tarantula’s body. Ensure that all body parts are correctly scaled concerning each other. Use reference images to help you measure and accurately represent the proportions. This will ensure a natural look. In addition, a solid foundation will make the drawing more appealing.
Leg Positioning and Symmetry
Another common issue is the positioning and symmetry of the legs. Ensure that the legs are evenly spaced and that they appear balanced. Use guidelines to help you place the legs accurately, and try to create a sense of symmetry, even if the tarantula is not perfectly symmetrical in the reference image. Pay close attention to the angles and positions of the legs to ensure they look natural and realistic. Avoid creating overlapping legs or creating the illusion of having too many or too few legs. The main goal is to ensure balance.
Over-Complicating the Details

It’s easy to get lost in the details, but avoid over-complicating your drawing, especially in the beginning. Focus on the essential features and basic shapes before adding complex details. Start with the overall form, and then gradually add textures, patterns, and hairs. Overdoing it can make your drawing look cluttered and unrealistic. Remember that simplicity can be effective. Don’t be afraid to simplify the details to achieve a better overall result. It is important to know where to focus your time and effort. Focusing on these main points will enhance the overall drawing.
Tips for Realistic Tarantula Drawings
To create a realistic tarantula drawing, it’s essential to incorporate certain techniques and approaches. This section offers some advanced tips to elevate your artwork. By incorporating these, you’ll be able to achieve greater detail and make your drawings appear more lifelike. These tips are intended to help you develop your skills and provide the best results. Let’s explore these useful concepts.
Observe Real Tarantulas
The best way to improve your drawing skills is to observe the subject you are drawing. If possible, observe real tarantulas (safely and ethically, of course!) or high-quality photographs. Pay close attention to their body structure, leg positioning, the texture of their exoskeleton, and the way light and shadow play across their bodies. Taking the time to look at the subject will enable you to see the small details that make a tarantula unique. Study reference images and take note of the colors, patterns, and any unique features that stand out. This visual research is crucial for understanding the anatomy and capturing the essence of the subject.
Use References

Always use reference images when drawing, especially if you’re a beginner. Reference images provide a visual guide to help you capture the correct proportions, details, and textures. Choose high-quality images with good lighting. You can also take your own photos of tarantulas. Print out the image or display it on your computer or tablet to study. Use the reference image to compare your drawing at every stage. It’s also a good idea to use multiple references, as this will provide you with a better understanding of the subject. By using reference images, you are much more likely to achieve a more accurate and realistic drawing.
Practice Shading Techniques
Mastering shading techniques is crucial for creating a realistic tarantula drawing. Experiment with different shading techniques, such as hatching, cross-hatching, stippling, and blending. Hatching involves using parallel lines to create shadows. Cross-hatching involves layering lines at different angles to build up shadows. Stippling involves using dots to create different values. Blending creates smooth transitions between light and dark. Learn the difference between each technique and then select the one that suits your drawing best. Shading is essential for giving the tarantula’s body depth and dimension. By practicing these techniques, you can create the illusion of volume and add greater realism to your artwork.
Drawing a tarantula can be a rewarding experience, allowing you to explore your artistic skills and appreciate the beauty of these fascinating creatures. With patience, practice, and the right techniques, you can create stunning artwork that captures the essence of a tarantula. Remember to enjoy the process, embrace the learning curve, and let your creativity flourish. Now that you have the knowledge and guidance, pick up your pencils, start drawing, and watch your artistic skills evolve. Have fun drawing.